
1. The operation was performed under general anesthesia. The patient was placed in prone position and the posterior median incision was made to cut the skin and subcutaneous fat.
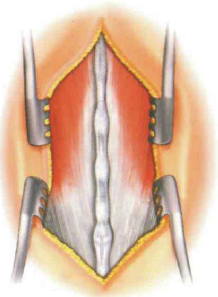
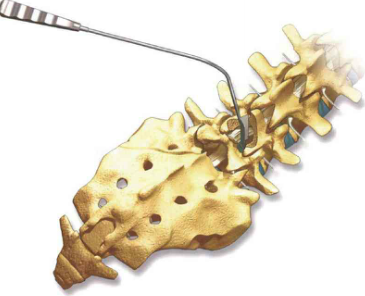
2. The lumbodorsal fascia on both sides of the spinous process was incised and the paravertebral muscles were separated bluntly. Maximum exposure of laminae, articular processes and transverse processes with automatic hooks.
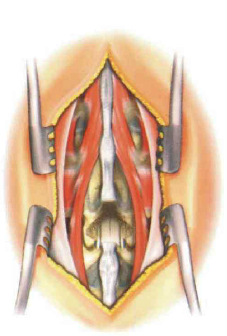
3. Partial laminectomy and facet arthroplasty, the lateral portion of the facet must be preserved to maintain posterior stability.
4. After laminectomy, ligamentum flavum was removed to expose the posterior margin of dural sac and annulus fibrosus.

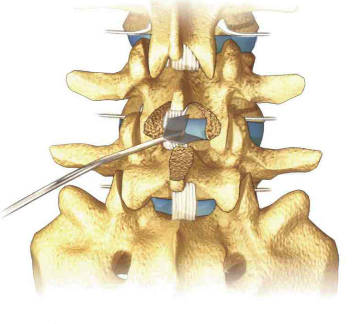
5. Carefully and gently pull the dural sac to the opposite side with a neuroprotector to expose the lateral edge of the intervertebral disc.
6. When pulling the dural sac, hemostasis of the posterior epidural vein of the vertebral body should be carefully carried out.
Step 2: Excision of Intervertebral Disc
7. First, the posterior longitudinal ligament and annulus fibrosus were cut rectangularly with a scalpel, and then the intervertebral disc was removed with various nucleus pulposus forceps.

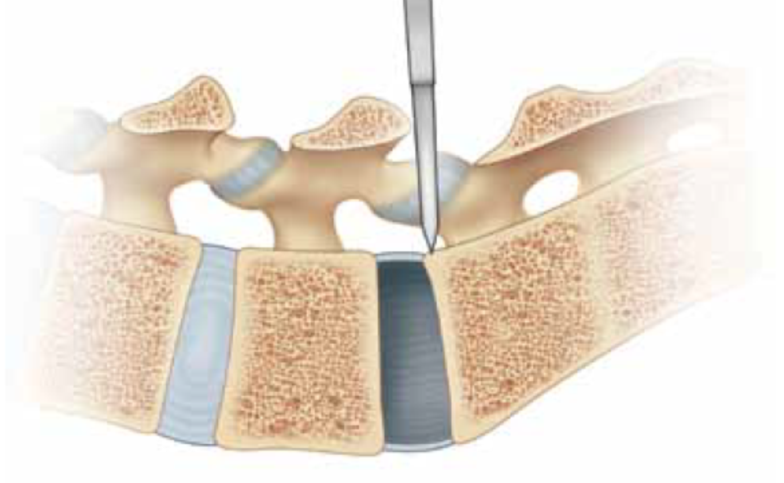
8. Routine clearance of osteophytes at the posterior edge of the vertebral body and the posterior upper edge of the lower vertebral body to facilitate the exposure of the intervertebral disc
9. The dural sac should always be protected during discectomy.
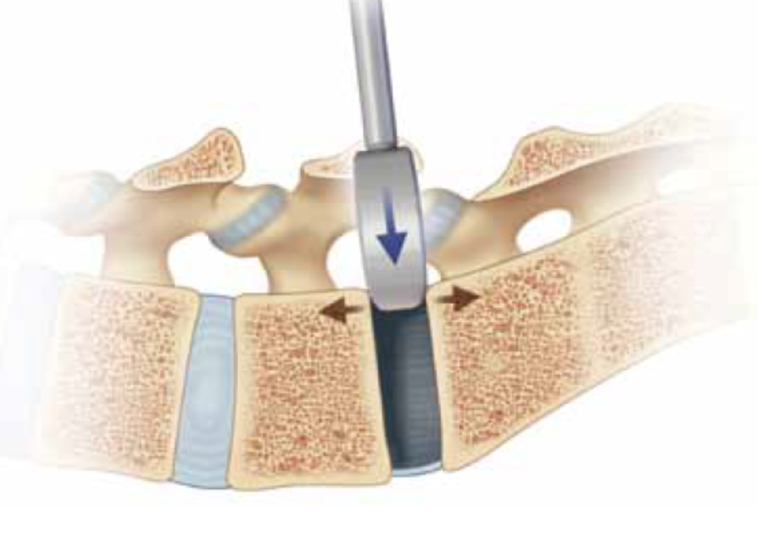
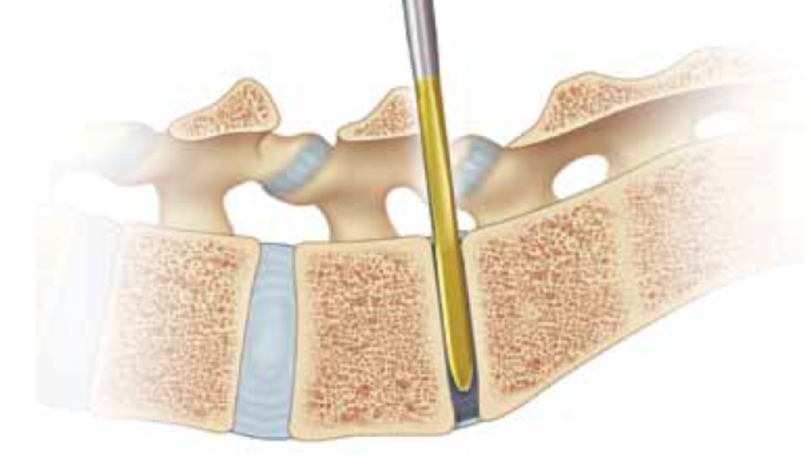
Step 3: Intervertebral Space Measurement
10. Insert the slot opener into the intervertebral space with a scale mark below its head. In most cases, the depth of insertion of the opener is 25-30mm.
11. The opener starts at 8mm and increases by 1mm per dimension until 13mm inserts the thinnest side into the intervertebral space and rotates 90 degrees to open the intervertebral space
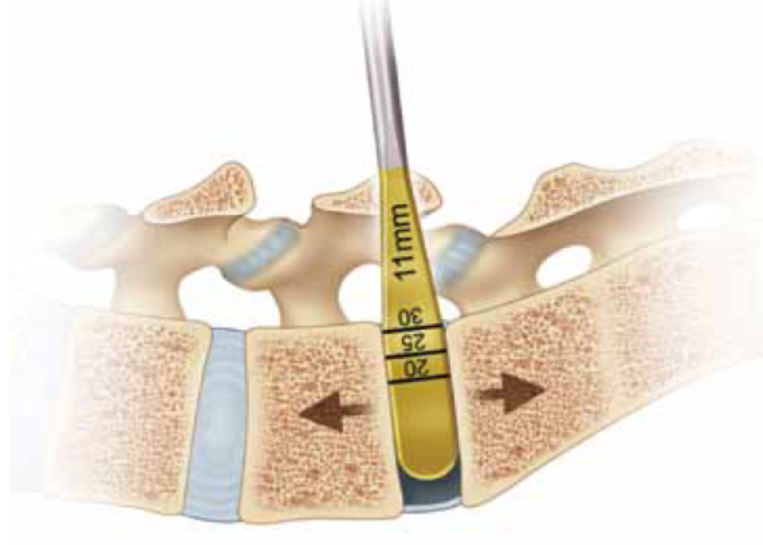
Step 4: Opening of Intervertebral Space
12. The larger model was inserted successively in the bilateral intervertebral space until the height of the intervertebral space was high enough to reach the decompression of the nerve root. The nerve root retractor was needed to protect the retention of one model in the operative area to ensure sufficient space on the opposite side to handle the endplate and implant the fusion device.
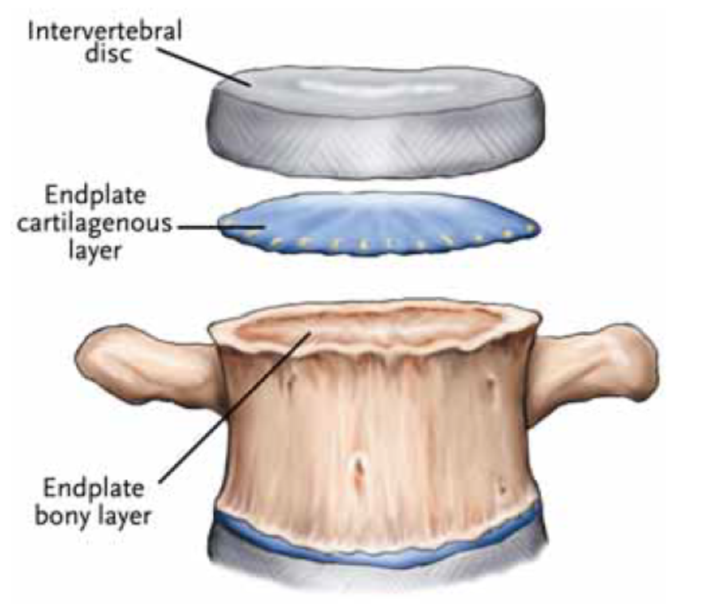
Step 5: Cartilaginous Endplate Treatment
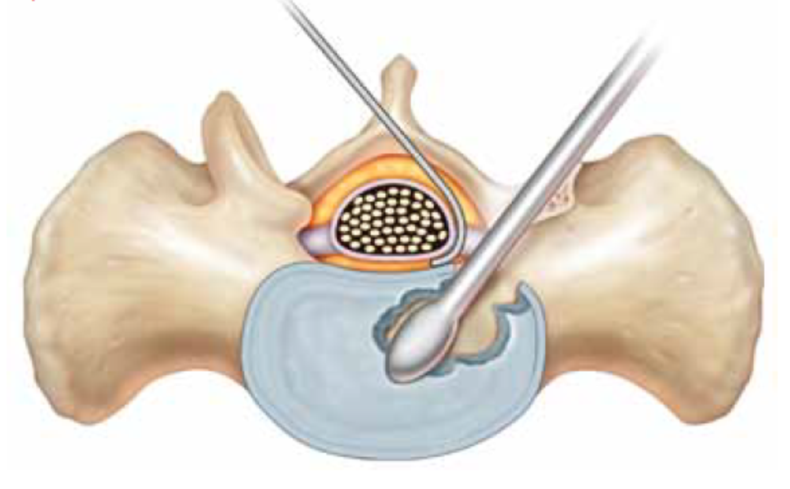
13. Remove the remaining disc tissue and cartilage endplate in the intervertebral space until there is a bleeding point in the osseous endplate. Bony endplates should be retained as far as possible because of their high strength, which can prevent cage sinking after implantation. Endplate files and bone scrapers are used alternately from small to large to clean up the cartilage endplates attached to the bone endplates. The specifications of the instruments must be in line with the specifications of the fusion cage in order to make the cage implantation more smoothly.
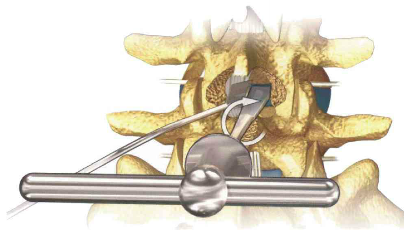
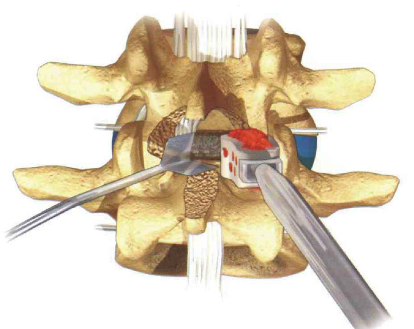
Step 6: Cage Implant
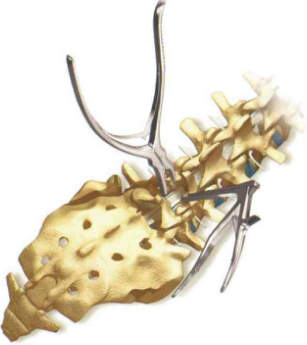
The cage dentate plane was oriented toward the upper and lower endplates, and the implant was implanted by striking the end of the implant with a bone hammer. The cage should be placed in the intervertebral space, and the same is true for the 3, 4mm from the posterior edge of the vertebral body.
Step 7: Selection of Cage Model
According to the preoperative imaging measurement results of vertebral segments and the maximum test model number, cage of corresponding size was selected, and the bone fragments were filled into the bone graft cavity, and the bone graft fragments were compacted with a compactor.