
Before operation, lateral radiographs should be used to determine Lordotic Curvature and Computed Tomography should be used to determine the insertion point, insertion angle, screw diameter and length. The diameter of screw should be filled with medial cortical aperture, and the length of screw should be 50-80% of the vertebral body.
The most commonly used screw for L5 is 6.5 mm in diameter and 45 mm in length.
Patient Position
Patient in prone position. Anesthesia machine and various monitors should be placed in proper position around them. When positioning, attention should be paid to avoid pressure sensitive parts and abdominal pressure. The normal lumbar lordosis was determined by lateral radiographs before operation and the normal curvature was maintained after operation.
Surgical Incision
The median thoracolumbar incision. The location and length of the incision were determined according to the segment of the diseased vertebral body.
Exposure of Vertebral Plate
1. Incision of skin, deep fascia and erector spinae.
2. According to custom, the muscles attached to the vertebral plate are slowly dissected with an electric knife or bluntly dissected with a vertebral plate dissector until the vertebral plate is completely exposed. This process should pay attention to hemostasis.
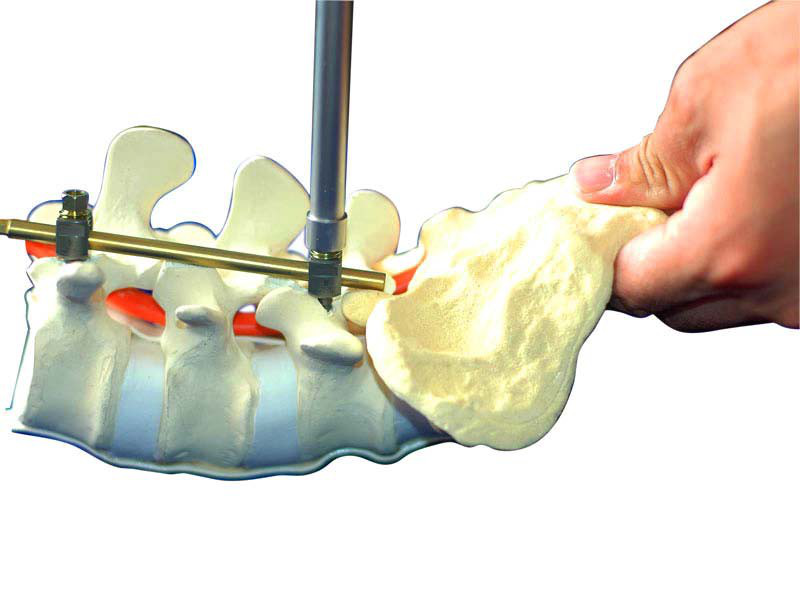
3. In addition, according to the needs of the disease, the vertebral canal can be exposed in the form of fenestration, half-lamina and whole lamina for decompression or exploration of the vertebral canal.
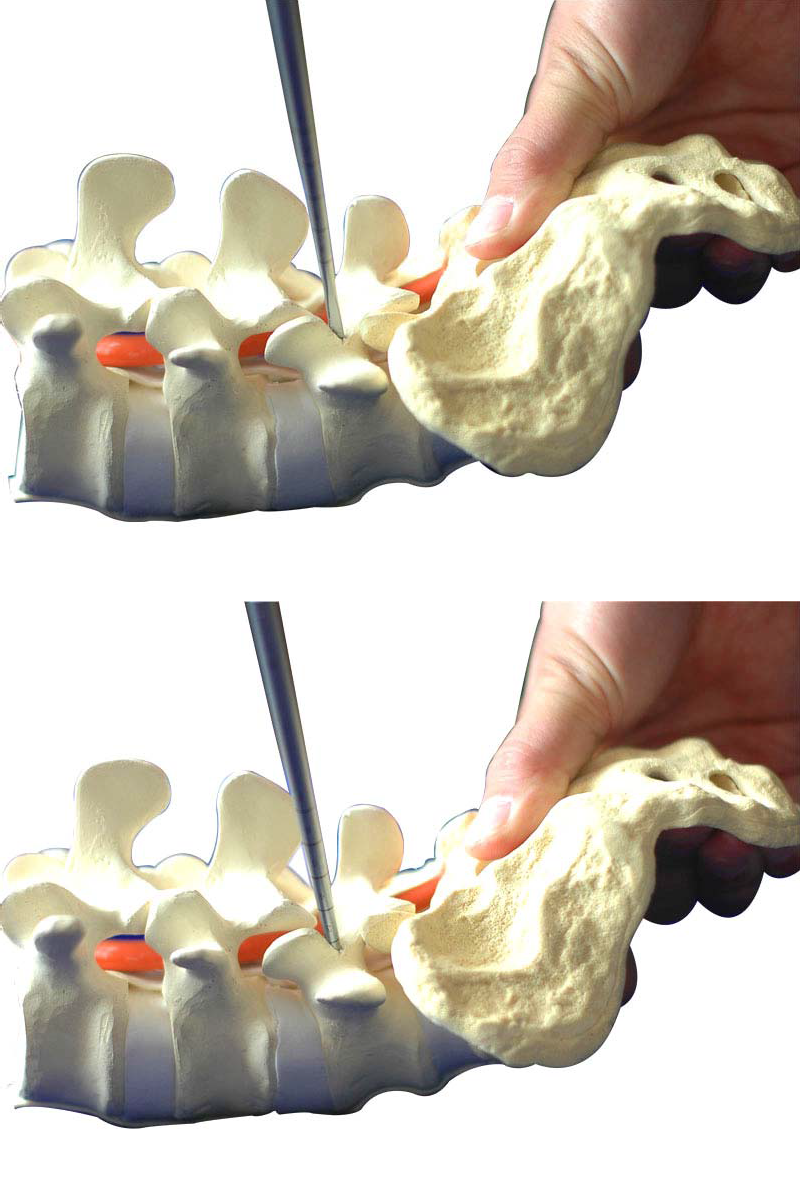
To Determine the Point of Insertion of Pedicle Screw
The point of intersection between the central axis of transverse process and the vertical line of the outer edge of the superior facet joint is the point of needling.
In general, the angle of needle insertion is 5-10 degrees inclined to the L1-L5 of vertebral body and 10 degrees inclined to the head side. In the S1 of vertebral body, the angle should be tilted 25-30 degrees to the head side.
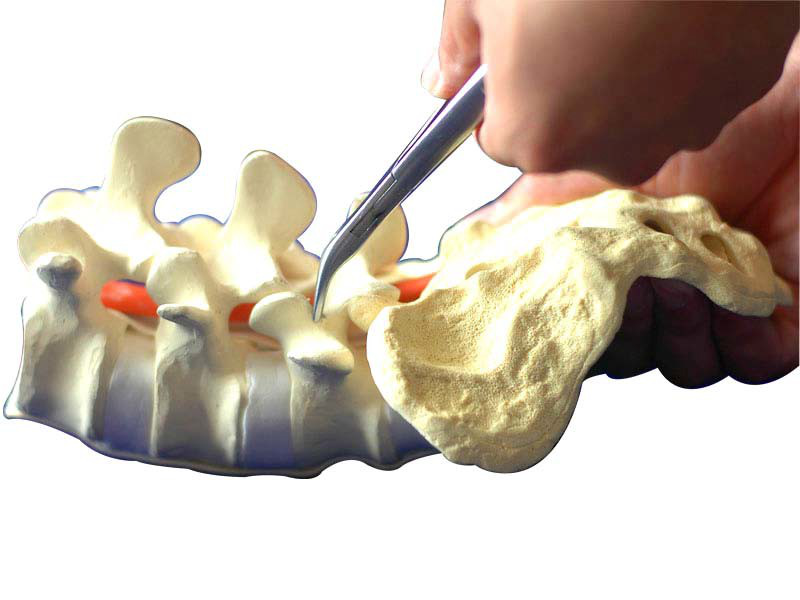
Preparation of Needle Insertion Point
The cortex of the needle point was removed with an open cone, grinding drill or bone-biting forceps. Clean the bone around the needle point to avoid bony occlusion.
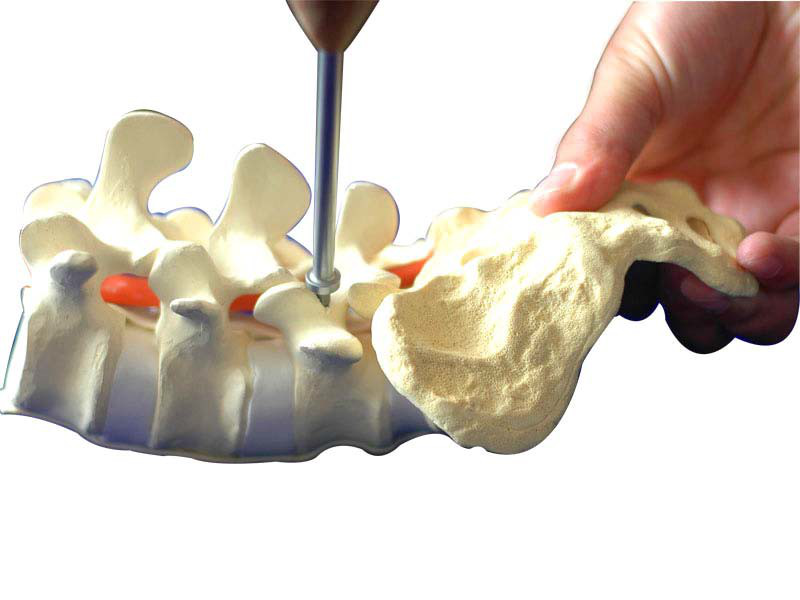
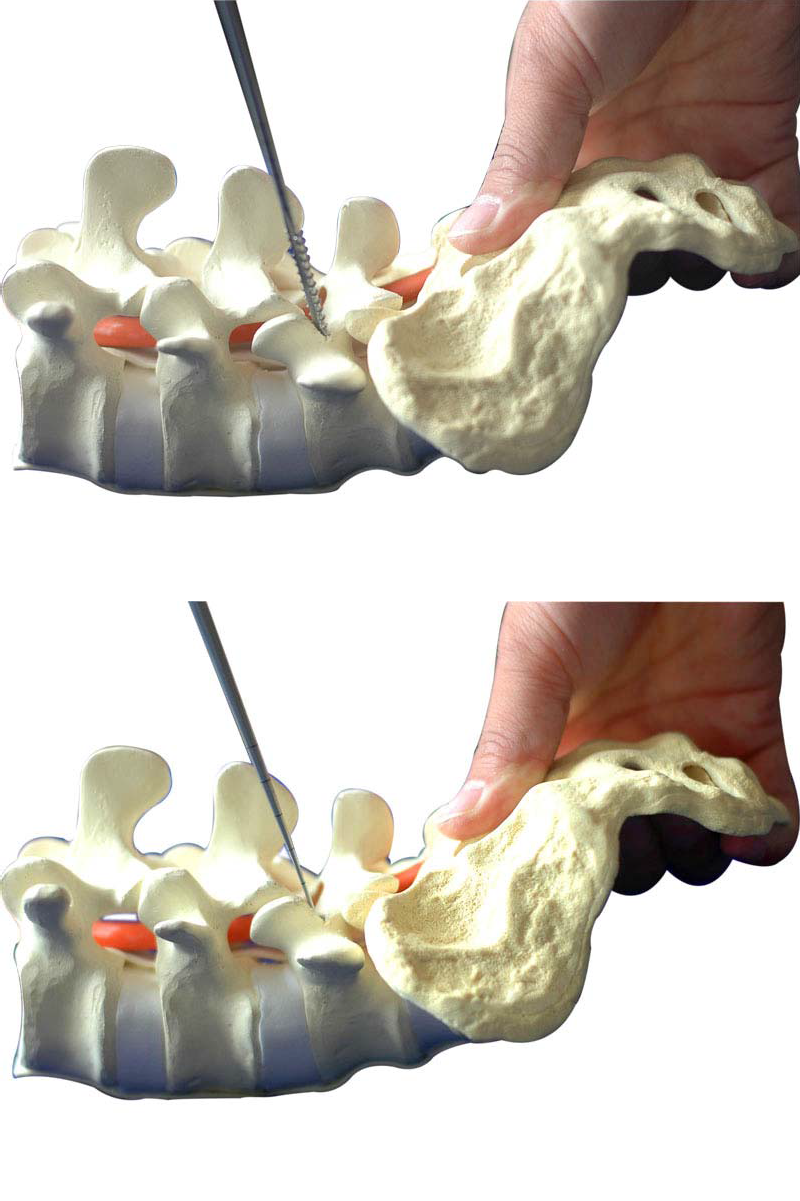
Preparing Pedicle Screw Path
The scaled pedicle opener was gradually drilled into the cancellous bone of the pedicle and vertebral body according to the needle insertion angle and depth. A spherical probe was used to explore the four walls of the screw path to determine that the screw path did not penetrate the cortical bone of the vertebral body. Another method was to observe the position of the pedicle locator in the screw path with a C-arm X-ray machine.
Experience:
1. Attention should be paid to the fact that the cortex of bone cannot be penetrated during the opening process. It should be ensured that the opener is always located in the cancellous bone, so as to avoid damaging the surrounding nerves and blood vessels.
2. The angle of insertion should be adjusted appropriately with the anatomical changes of pedicle.
3. For the sake of safety, do not perform bi-cortical fixation if necessary.
Tapping
Choose appropriate tapping and tap along the nail path that has already been made. Pay attention to tapping depth.
Implantation of Pedicle Screw
Connect the screw with the pedicle screw driver and screw it into the prepared screw path. Pay attention to the depth of the spin-in.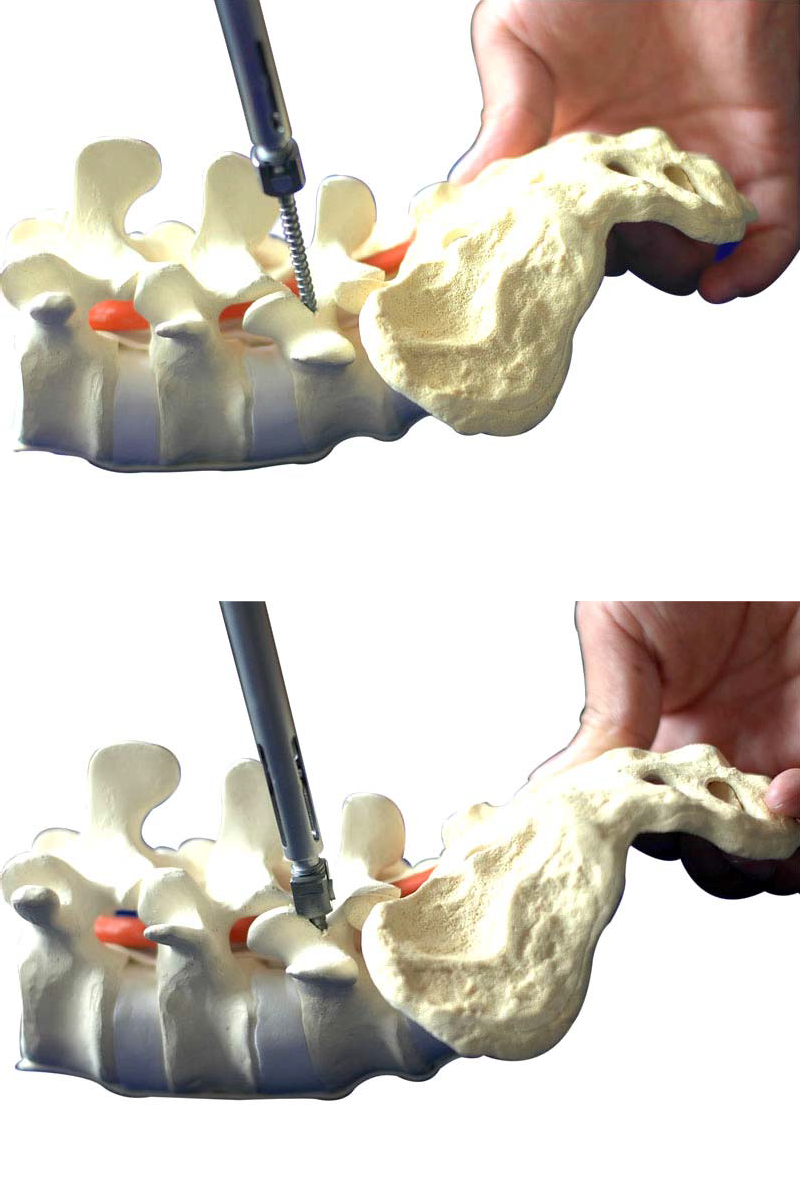
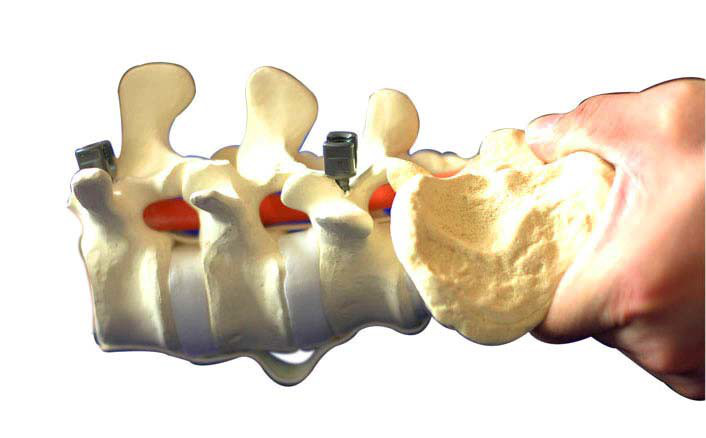
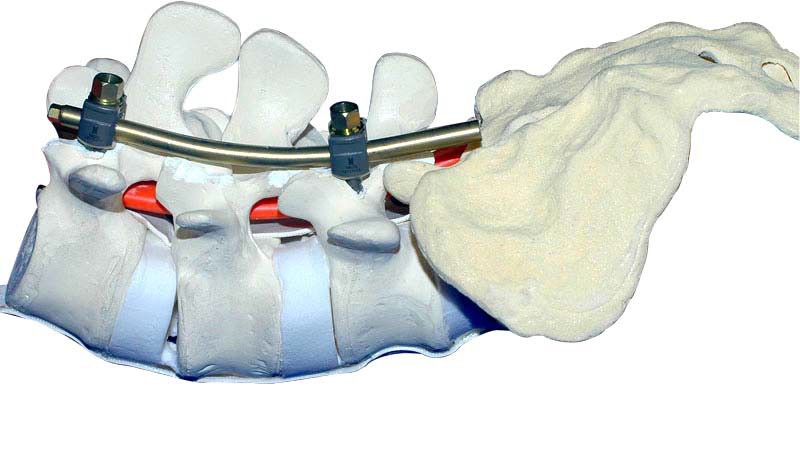
Preparations for Connecting Rods
When all pedicle screw is ready, the length of the connecting rod and the bending radian are measured with the die rod, then the connecting rod is cut according to the die rod, and the connecting rod is folded into a predetermined radian with the bender. The prepared connecting rod was inserted into the tail groove of pedicle screw.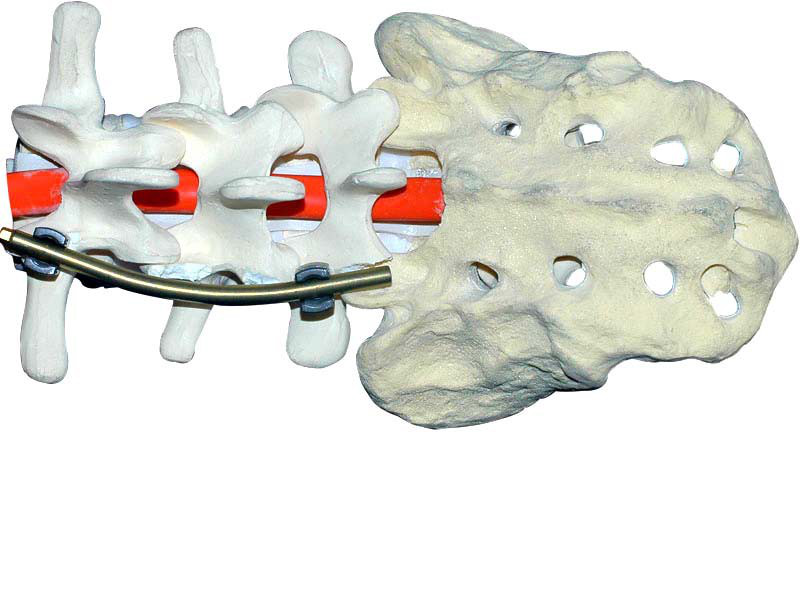
Temporary Locking
The screw plug is screwed counterclockwise into the tail of the screw with a plug screw, and then the screw plug is tightened clockwise when the "click" sound is heard, thus avoiding the slippage of the screw plug. If necessary, the rod can be pressed down and the screw plug can be tightened with a rod press.